
How To Grow Your Seed Garlic
It is easy to grow great garlic. Sure, it takes a little planning and effort—understanding the plant’s cycle and needs, giving attention to soil quality, and picking the best location to grow are all key. But once you know what you’re doing, you will be able to enjoy delicious gourmet garlic any time you like!

Before you plant
Great garlic starts with good garlic bed preparation. Your garlic wants to grow in well-drained soil. It requires good nutrients available and Garlic wants full sun exposure. You want a neutral PH in your soil. We recommend you get a soil test done so you can adjust per your specific needs.
Our garlic beds are heavy clay soils, we add compost to the beds and mix in well. We also strongly believe the secret to growing good garlic is having a healthy microbiome in the soil, therefore we do not use any harsh chemicals, pesticides, herbicides or fungicides on our farm. We use blood meal and bone meal for fertilizers, and we add Espoma brand bio-tone starter when we plant the cloves.
Garlic does not compete well with weeds. Weeds in the garlic bed will reduce bulb size dramatically. On our farm we use biodegradable weed barrier that is made from corn starch. Once your bed is prepped, put the weed barrier down, poke holes in the weed barrier where you will plant the garlic and after done planting put approximately 3” of mulch over top the bed.
Planting the cloves/ crop care
Plant your garlic in the fall, roughly 6 weeks prior to hard freeze. Your goal is to get the garlic growing its roots over the winter, but put up only a little green before winter sets in.
Once you have beds prepped it’s time to plant. Each bulb will have anywhere from 5 to 20 cloves. Each clove will be a bulb next year. The larger the clove, the larger the potential bulb will be. Hard neck garlics cannot stand up on their own, it is very important that you plant the clove with the bottom side down, and have the clove standing up. Plant the cloves approximately 1” below soil surface. Plant the cloves 6” apart in a grid. We add a little blood meal, bone meal and bio-tone starter to each hole as we plant. Once you have the bed planted put on approximately 3” of mulch. Pine needles, straw, bedding from chicken coop etc. will work. Make sure the mulch doesn’t add weed seeds, do not use hay.
Your garlic will grow over winter, mainly underground developing its root system. For us nature does a good job providing water over winter, snow cover is a good thing, it along with the mulch will help stop heaving from freeze and thaw. Once spring hits the garlic will start putting up leaf stalks, you may need to pull the mulch back to allow the leaves to come up, once they are a few inches tall, put the mulch back on them. Once you see growth, you will want to start fertilizing. We add blood meal and bone meal weekly preferably just before a rain event. Watch for weeds, keep evenly watered and feed regularly through the month of May/June.
In June you will start to see the flower stalks, called scapes come up. They will curl and twist. When the are curled, pick them. Picking the garlic scapes encourages larger bulb formation, and the scapes are delicious!
We stop fertilizing and watering after we pick the scapes. A couple of weeks after scape harvest you will notice the plants starting to yellow. When the bottom 1/3 of the leaves are dead it is time to harvest!
Harvest
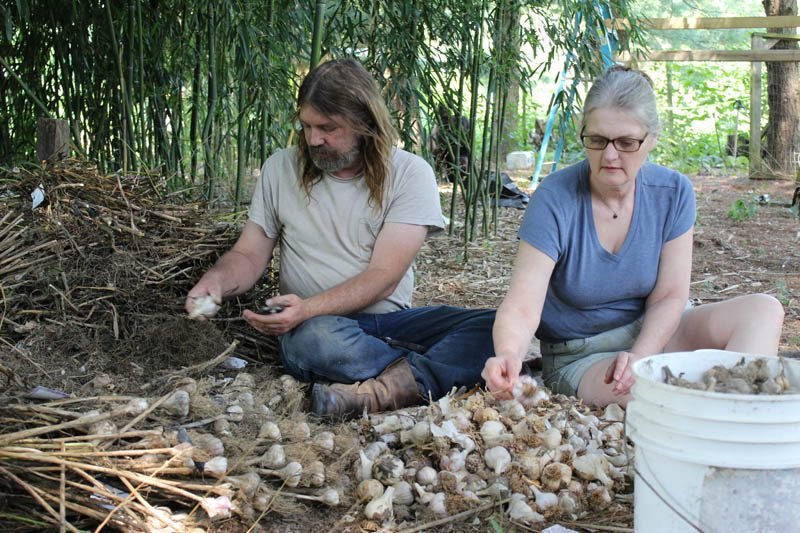
When you harvest, do not pull the bulbs out by the plant, they have a firm hold on the earth and will not give in. you will want to use a garden fork or broad fork to loosen the soil around the bulbs and gently remove them.
The bulbs are easily bruised or damaged at harvest, you will want to hang your plants out of the sun, with good ventilation for two or three weeks to allow them to cure. Once cured, you can remove the leaves and roots and enjoy your harvest. Bulbs will store for approximately 6 months.
Tips
Garlic will have roughly 8 leaves to the plant, each leaf equates to a layer of skin on the bulb, healthy leaves mean the bulb will store longer. Harvesting too soon will produce smaller bulbs. Harvesting too late will result in the bulbs splitting and not storing well. When the plant has 1/3 of its leaves turn brown it is time to harvest. The bulbs will be mature and will have a tight skin protecting it.
Wet soil will cause the bulbs to rot. It is best to plant on a slope, making sure you have good drainage for your garlic bed. Too dry will yield reduced bulb sizes. You will want to keep your garlic evenly watered but not saturated.
Pests are rarely a problem; however, you don’t want to grow garlic in the same location more than 3 years. Keep garlic separated from other Allium species (onions, chives etc.) If your mulch is too deep (more than 3”) you can encourage rodents and other critters to take up residence in your garlic patch. They generally won’t bother your crop but may get your attention when you are working in your beds!